
Ball Transfer Installation and Maintenance Guide
Why Ball Transfer Maintenance Matters
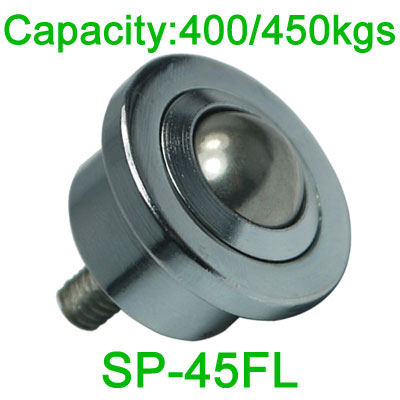
Ball transfer units are small, simple components. A steel ball sitting on a bed of smaller support bearings, housed in a cup. When they work, packages flow freely and operators barely notice them. When a ball sticks or seizes, it stops a line, damages product, and costs time to replace. Proper installation and regular maintenance are the difference between units that last for years and units that fail in months.
This guide covers the practical procedures that keep ball transfer units running smoothly in packaging lines, sortation hubs, and heavy industrial environments.
Installation: Getting It Right from the Start
The most common cause of premature ball transfer failure is poor installation. Three factors matter above everything else.
Mounting surface flatness. The mounting surface must be flat and clean. A gap of even 0.5 mm under one side of a flange-mounted unit tilts the ball, concentrating load on one edge of the support bearing ring. That single point of contact wears rapidly, and the ball binds within weeks. For ball transfer tables, use a machined plate or grind the frame surface flat. Shim any low spots before bolting down the units.
Ball height alignment. All balls in an array must protrude at the same height above the mounting surface. A ball that sits too low never contacts the load, wasting its capacity and overloading neighboring units. A ball that sits too high carries more than its share and wears out early. Most flange-mount and stud-mount units have a designed ball rise. Check it with a straightedge across the array and adjust with shims or by selecting units with matching dimensions.
Bolt torque. Over-tightening is a common mistake. Flange-mount units secured with excessive torque warp the housing cup, pinching the support balls against the main ball. The result is a unit that feels tight from day one. Torque to manufacturer specifications, typically in the range of 15 to 30 Nm for medium-duty units and 40 to 70 Nm for heavy-duty units like the BTFM series. Use a torque wrench, not an impact driver.
Spacing Guidelines for Load Distribution
Ball transfer units work as an array. The spacing between units determines how much weight each ball carries and how stable the load feels. The general rule is that any load must contact at least three balls at all times. For rectangular packages, that means spacing no greater than half the shortest package dimension.
For heavy-duty steel mill applications where sheets may be 8 feet wide and 20 feet long, a grid pattern with 12-inch centers in both directions is standard. Lighter packaging applications can use 6-inch or 8-inch spacing depending on package size and weight. Manufacturers provide load distribution charts that calculate the required number of units based on the heaviest load and the surface area of the load.
Spring-loaded ball transfer units are worth considering for uneven loads or impact zones. The spring cushion absorbs shock when a heavy box drops onto the table, protecting both the ball unit and the mounting frame from fatigue damage.
Regular Inspection: What to Check and How Often
A monthly inspection catches most problems before they cause downtime. The procedure takes about 10 minutes per table or conveyor section.
Spin each ball by hand. It should rotate freely with no grinding, clicking, or rough spots. If a ball feels gritty, clean it and try again. If the roughness persists, the support bearings inside are likely damaged and the unit needs replacement.
Check for visible wear. Look at the main ball surface for pitting, flat spots, or corrosion pitting. A smooth ball with a consistent surface finish is fine. A ball with visible dents or rust spots should be replaced before it damages the product contacting it.
Listen while the system runs. Ball transfer units operating normally produce a quiet rolling sound. A squealing or scraping noise indicates a loss of lubrication or internal damage. Locate the noisy unit and inspect it immediately.
Check seating and alignment. Make sure each unit is still flush with the surface and not tilting. Bolts can loosen over time from vibration. Re-torque any loose fasteners before they cause further misalignment.
Heavy-use environments may need weekly inspections. Packing stations running three shifts in a parcel hub should check their ball transfer tables every Friday before the weekend shutdown. Steel mill cut-to-length lines processing 500 tons per shift should inspect at every scheduled maintenance window.
Troubleshooting Stuck Balls
A stuck ball is the most frequent complaint on ball transfer installations. The causes fall into three categories.
Debris jamming. Dust, dirt, packaging tape, or metal fines can wedge between the main ball and the housing rim. The fix is simple: blow compressed air around the ball while rotating it by hand. If the ball frees up and spins smoothly afterward, no further action is needed. For sticky residue like tape adhesive, use a mild degreaser on a cloth, not a solvent spray that could wash lubricant out of the support bearings.
Corrosion binding. In humid environments or washdown areas, rust can form on the main ball or the housing interior. Light surface rust can be removed with fine steel wool or a Scotch-Brite pad. Never use sandpaper, which scratches the ball surface and creates rough spots that accelerate future corrosion and wear. After cleaning, apply a light coat of machine oil and rotate the ball to distribute it into the internal bearings.
Internal bearing failure. If a ball is stuck and cleaning does not free it, the support bearings inside the housing have likely collapsed or shifted. The unit must be replaced. Do not try to disassemble and rebuild standard ball transfer units. The internal bearing cage is precision-assembled and field repairs rarely restore original performance. On heavy-duty units like the Omnitrack 9000 series or the BTFM line, service kits are available for overhaul, but for most standard units, replacement is faster and more reliable.
Ball Replacement Intervals
How often should ball transfer units be replaced? There is no single answer because operating conditions vary widely. But typical service life in different environments provides a useful guideline.
In clean packaging lines handling lightweight cartons, ball transfer units often last 3 to 5 years with basic monthly cleaning. In parcel sortation hubs where packages are dirty and the environment is dusty, expect 12 to 18 months before the first units need replacement. In steel mills with heavy loads, high temperatures, and metal debris, heavy-duty ball transfer units may need replacement every 6 to 12 months depending on load cycling.
The smart approach is to replace units proactively based on inspection results rather than on a fixed schedule. Keep a few spare units of each type on hand so that failed units can be swapped immediately. When one unit in an array fails, inspect its neighbors closely, because they have been carrying extra load and may be close to failure themselves.
Seal Maintenance
Many ball transfer units include felt or rubber seals between the main ball and the housing to keep contaminants out. These seals need attention because they also trap moisture against the ball surface.
For felt seals, inspect them during each cleaning cycle. If the felt is dry, cracked, or compressed flat, it is no longer sealing effectively. Replace the entire unit or, on serviceable models, replace the seal ring separately. Never oil a felt seal directly. Oil-saturated felt attracts dust and turns into a grinding paste.
For rubber or polyurethane seals, check for tears or hardening. In high-temperature environments like steel mills, rubber seals degrade faster than felt. Consider removing the seal entirely on heavy-duty units in hot applications, as the sealing benefit is outweighed by the risk of seal debris entering the bearing cavity.
Some heavy-duty ball transfer units use no seal at all, relying on a close-tolerance gap between the main ball and the housing to keep out large debris. These units require more frequent cleaning but eliminate seal maintenance entirely.
Load Testing After Maintenance
After any maintenance or replacement, run a load test before returning the system to full production. Place a representative load on the ball transfer array and push it through the full range of motion the system requires. Check that the load moves smoothly in all directions, that no balls are sticking, and that the load does not tilt or rock. For motorized systems, run the conveyor through several cycles at operating speed and listen for unusual noise.
A 10-minute load test after maintenance catches misaligned replacements, loose fasteners, and improper ball height before they cause a production stoppage. Document the test results and keep a log of all replacements. Tracking which units fail and how often helps identify patterns. A section that consistently fails faster than others may have an underlying issue with surface flatness, load concentration, or environmental contamination that periodic inspection can catch earlier.
Final Notes on Maintenance Planning
Build a simple spreadsheet or checklist for each ball transfer system in your facility. Record installation dates, inspection results, and replacement history. Color-code by usage intensity: red for heavy-duty steel mill lines, yellow for sortation hubs, green for light packaging stations. Schedule inspections during planned downtime so they do not compete with production.
Ball transfer units are easy to ignore precisely because they are reliable. A visible maintenance routine, with labeled stations, scheduled checks, and documented history ensures they stay that way.